Adventures in programming: Why is vim doing that?

Often in programming, you set out to write some code and you end up on a wild tangent instead. Seeing how someone else walks through one of their wild tangents can be very helpful, so here’s a walk through of the wild tangent I went on today.

What was I trying to do?


I’m working on scanning a bunch of old family photos and I eventually plan to put them online. Before I do so, I want to make sure the EXIF metadata is useful and well formatted, so I created myself a new github repo to store some scripts I’m planning to write. As I was writing a commit message while adding my initial .gitignore, I noticed that vim was inserting newlines and wrapping my commit message without me hitting Enter to move to a new line. While I certainly love a well formatted commit message, it really pulls me out of any kind of flow to have my text editor moving me to a new line without my asking. This annoys me enough, that I decided to dig into vim and figure out why my text was auto wrapping.

Why is vim automatically wrapping text?


Continue reading “Adventures in programming: Why is vim doing that?”

Quick .vimrc for golang

Like vim? Hate tabs, but are writing some golang, which insists on tabs? Here’s what I just updated my .vimrc to today:

set expandtab
set tabstop=4
set ruler
syntax on
if has('autocmd')
    filetype on
    if !exists("autocommands_loaded")
        let autocommands_loaded = 1
        autocmd FileType go setlocal noexpandtab
    endif
endif

Dusting off the old blog

I’m planning to spend less time on social media in the next couple of weeks to avoid panic spiraling about the election, so I decided to revive my blog so that I still have somewhere to ramble on the internet. Apparently it’s been nearly 6 years since I last wrote over here. The last 6 years have been, uh, eventful.

In approximately chronological order, here is just a small selection of what has happened during that time:

  • Had kid 1 (who just turned 5!!)
  • Bought a house
  • Red, my cat since college, died
  • The 2016 presidential election, uh, situation
  • Got a second dog
  • Had kid #2 (who is now 2.5)
  • My mom died (approximately 6 weeks after kid #2 was born)
  • Burned out on managing, moved to an individual contributor role and a new company
  • Covid-19 pandemic

We also travelled a number of fantastic places, ate and cooked a lot of great food, had lots of good times with friends, and a lot more I’m not remembering.

Review: Overtone Color Depositing Conditioner

I’ve had my hair dyed pink at the ends for nearly 2 years now so I was incredibly excited when I heard about Overtone in August.  Overtone makes “color depositing conditioner” — they combine hair dye with conditioner, so every time you condition your hair, you add a bit more color.

Overtone makes two types of conditioner — Daily Conditioner and Deep Conditioner.  I have Extreme Pink in both.

For the Deep Conditioner, they recommend you use it weekly and leave it in for 10 minutes.  I prefer to use every 2-3 weeks, but leave it in for a couple of hours.  My color doesn’t come out quite as intense as when I used Punky Color by Jerome Russell, but  the Overtone conditions better and makes less mess if I accidentally drip some on the bathroom counter.  I apply in sections with tint brushes and gloves and comb through to get good coverage.

For the Daily Conditioner, I use it basically as directed.  I find I get the best results if I condition my hair in 4 or 5 batches instead of trying to get everything at once.  When I tried to condition my hair without sectioning, I was finding I wasn’t getting full coverage.

I initially tried the Vibrant Pink, as I was worried by the recommendation that you should use gloves when applying.  I knew there was no way I’d want to use gloves every day in the shower.  I ended up switching to the Extreme Pink, however, since I found that the Vibrant Pink wasn’t quite keeping my hair as bright as I wanted — it was more pastel rather than the Bright Fucking Pink I was going for.  I’ve been happy about the switch — my hands are a bit pink right after I apply the conditioner, but by the end of my shower, they’ve gone back to normal.

For both types of conditioner, I make sure to thoroughly cover the bleached parts of my hair.  I don’t worry about it, however, if I end up covering other parts of my hair — my natural color is dark enough the pink doesn’t make a huge difference.

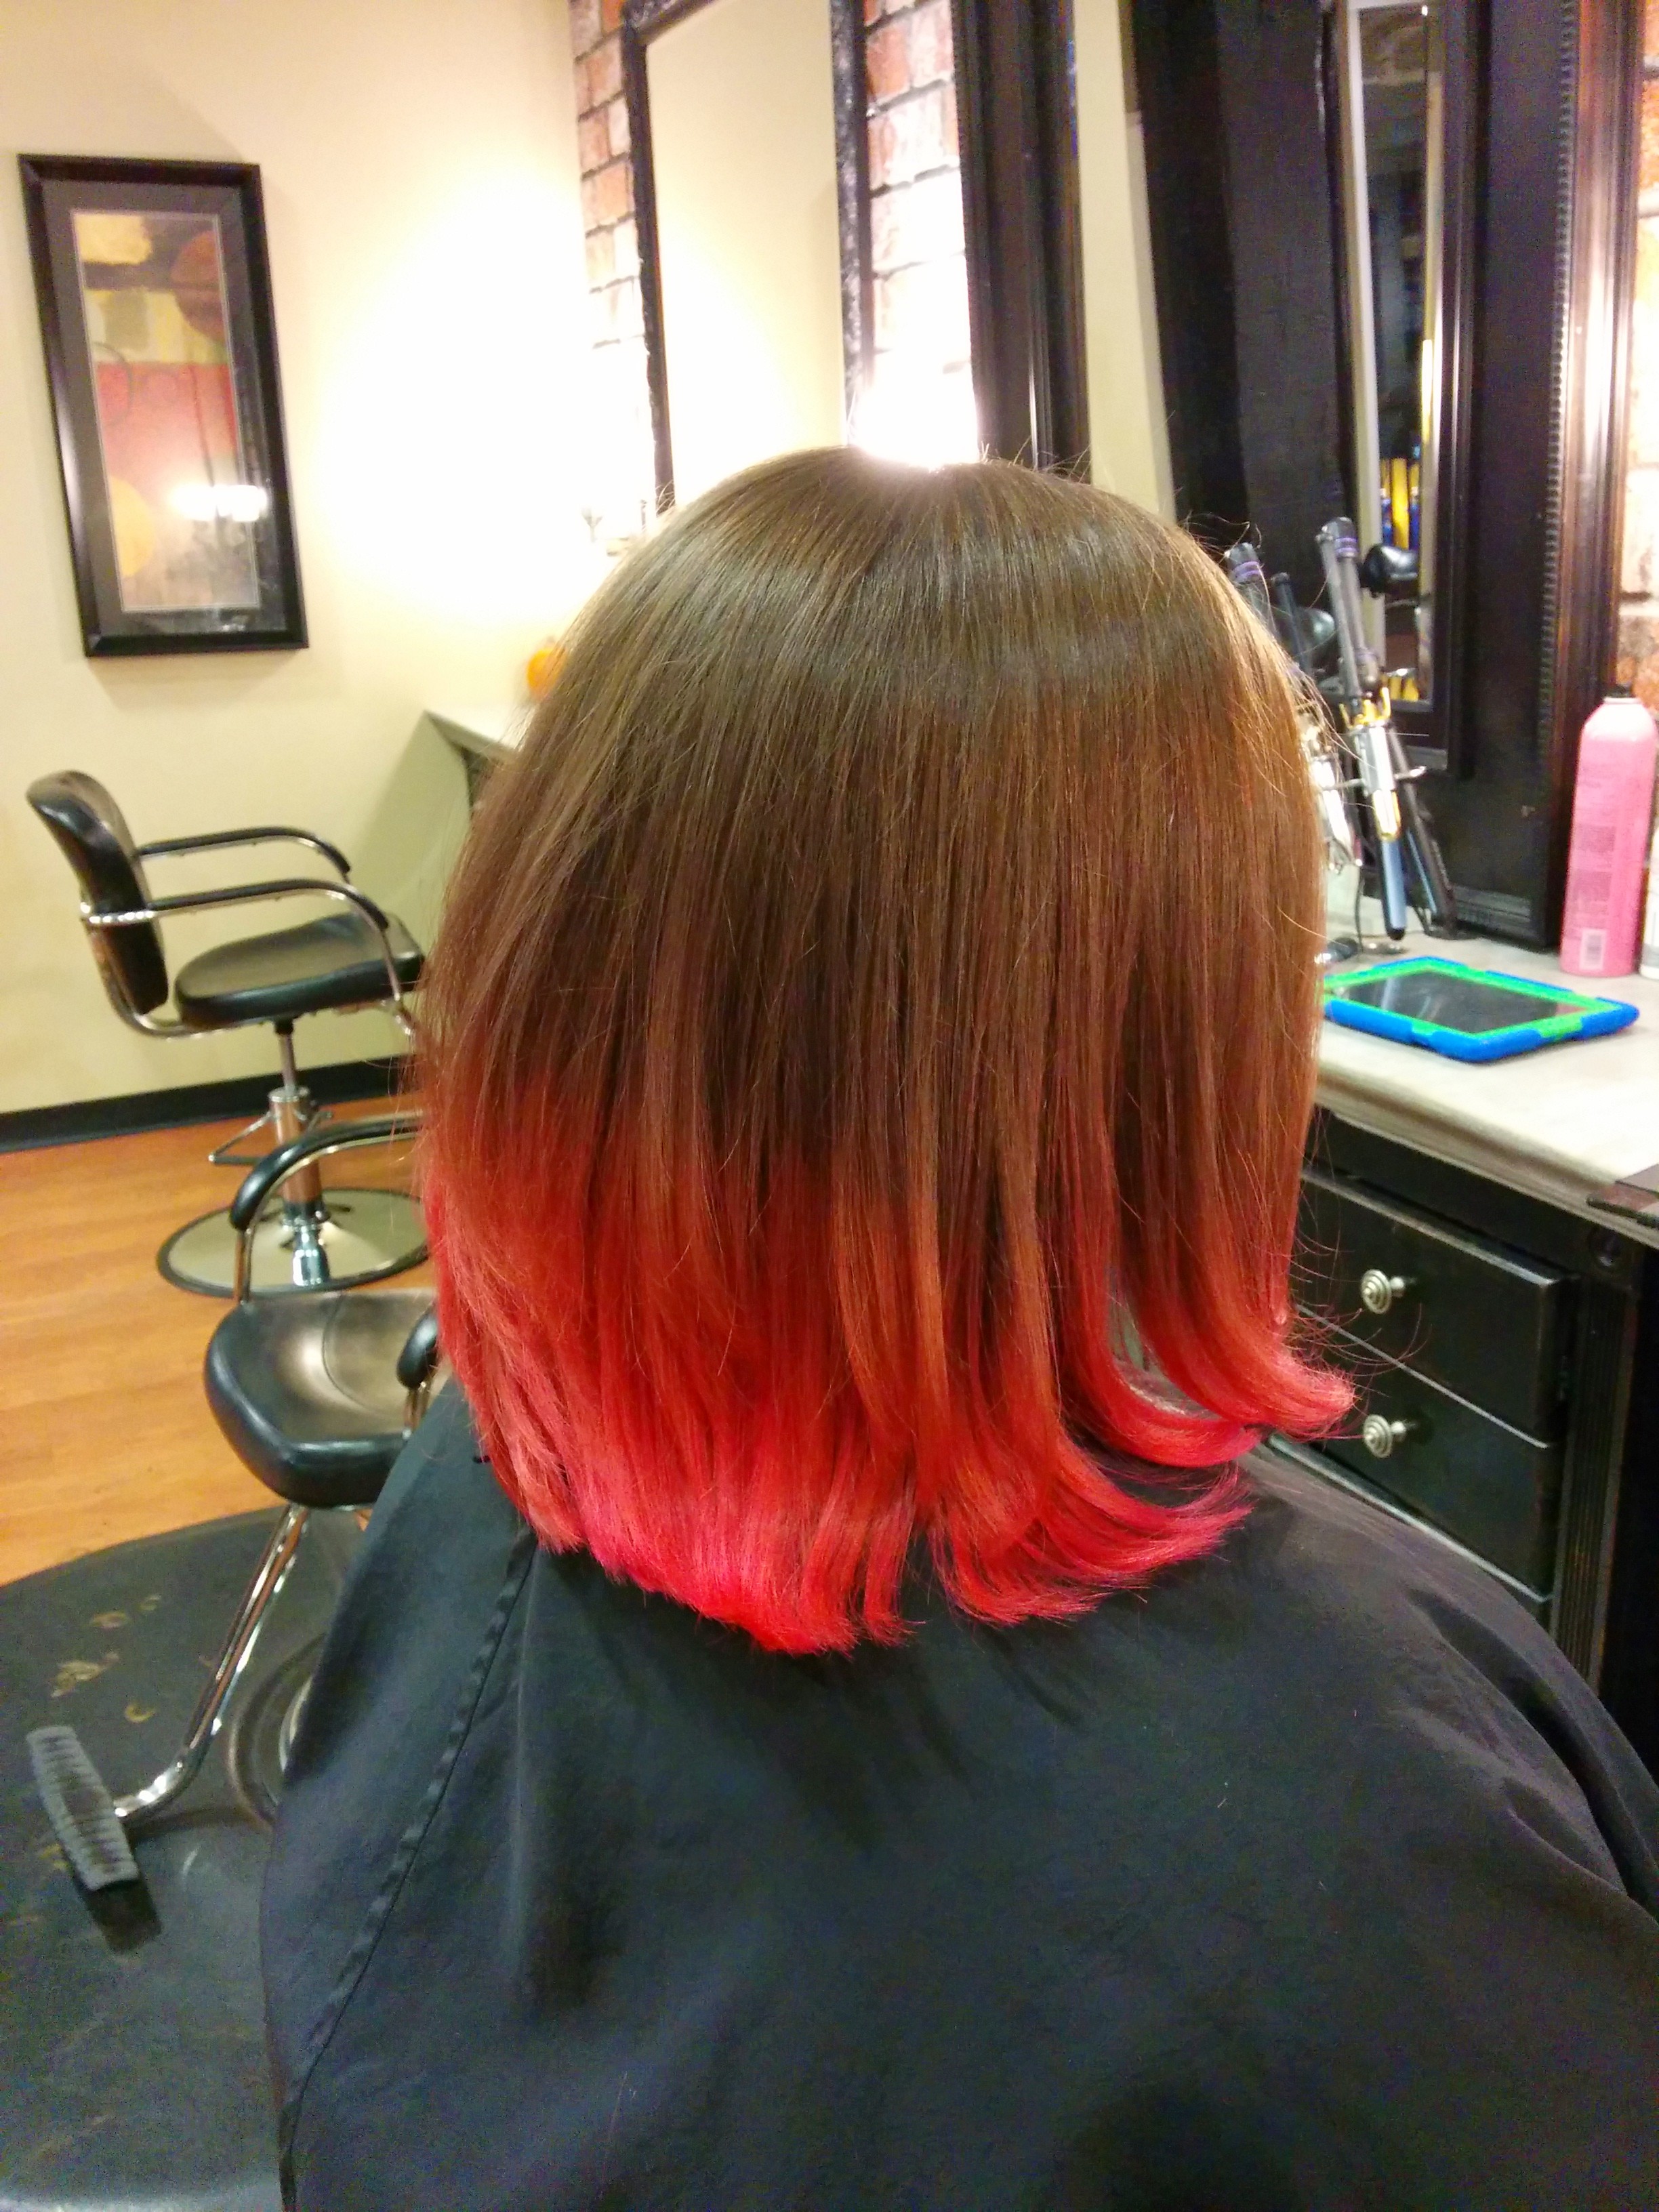
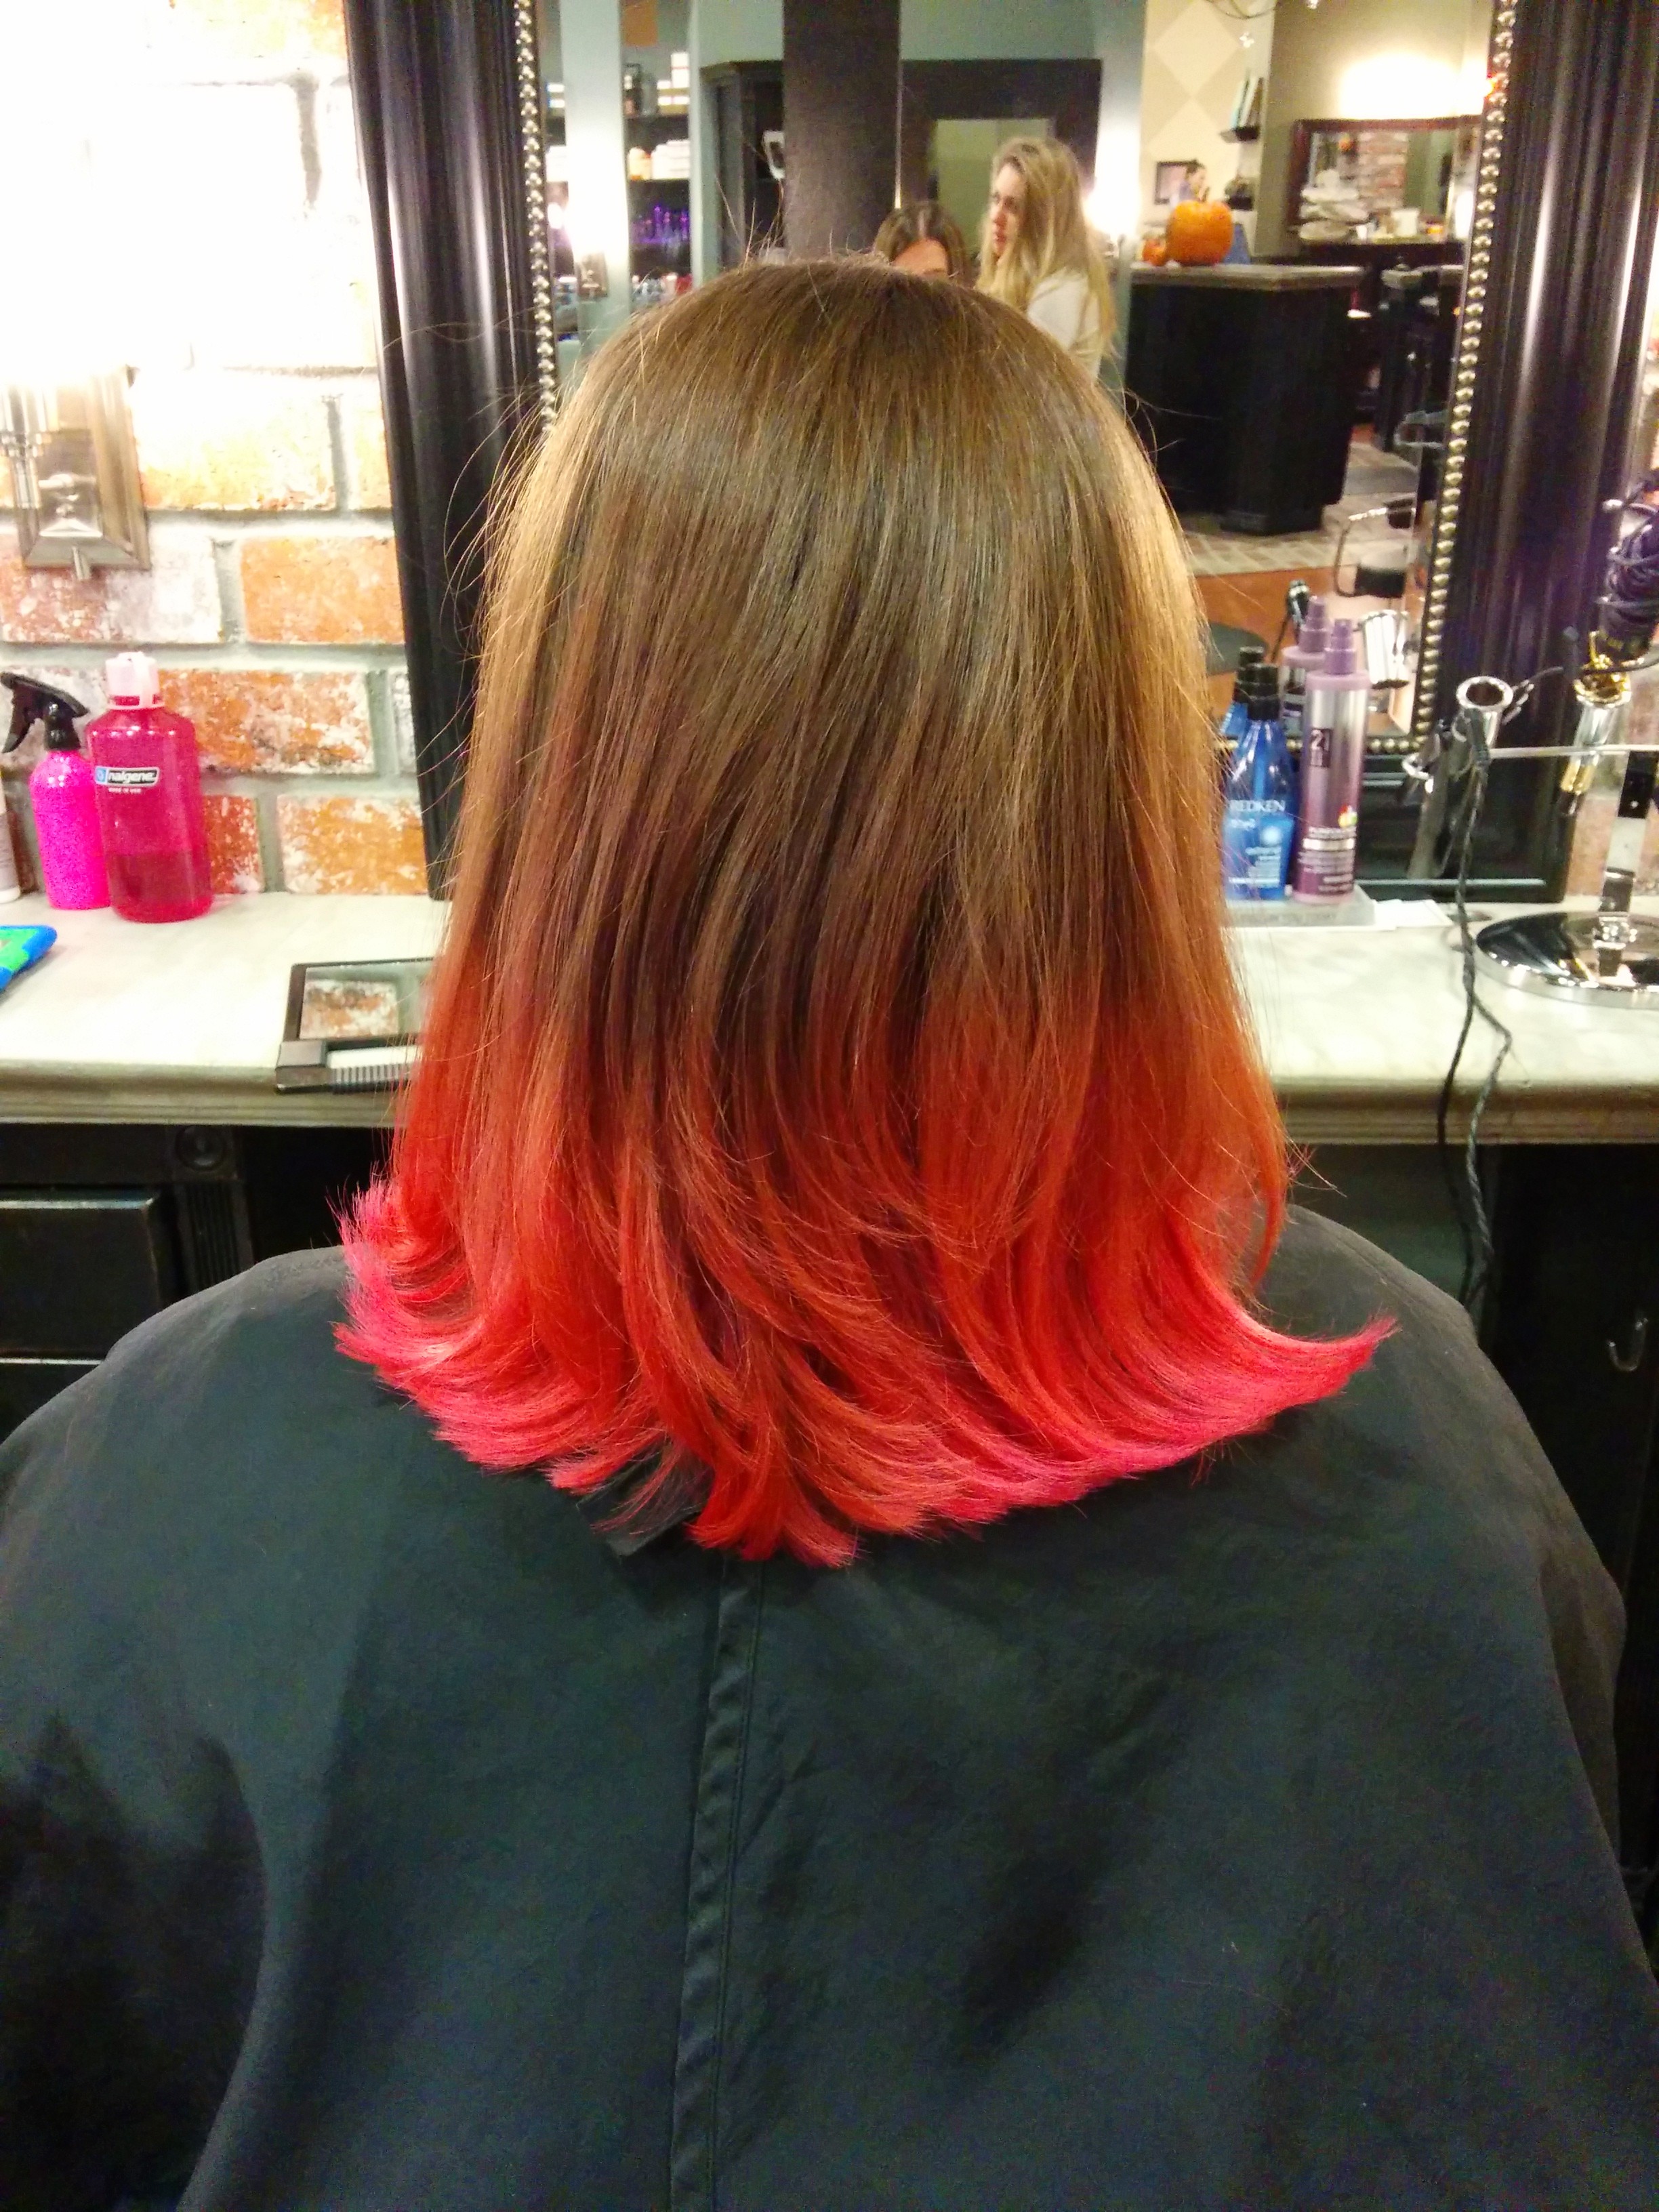
So, here’s what my hair looks like, freshly cut and relatively soon after using the Deep Conditioner:

IMG_20141112_192631 IMG_20141112_192609 IMG_20141112_192558

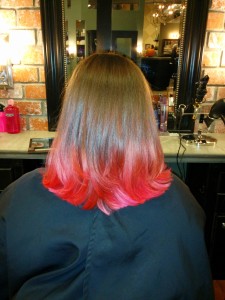
(haircut & pics by Jessica Claude, who always does a great job with my hair)

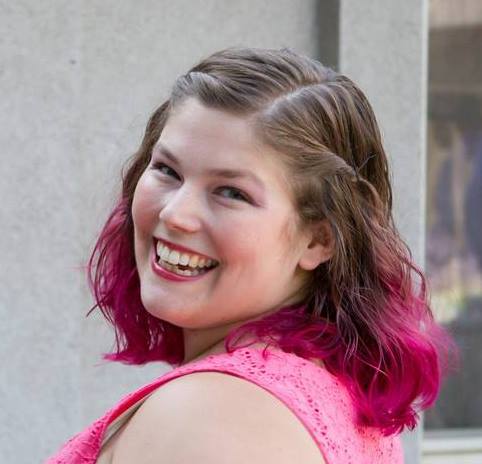
As a comparison, here’s what my hair looks like shortly after using the Punky Color in Flamingo Pink:

10502470_611484043946_3621777792955479579_n 
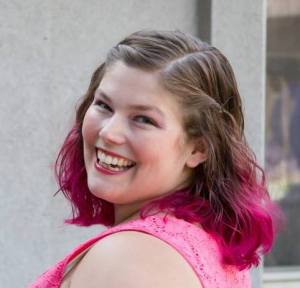
(Photo by the awesome Stuart Jones)

The Overtone doesn’t come out quite as bright as the Punky Color, but it’s much easier to use, so my hair stays brightly colored much more of the time than it did when I was using the Punky Color.  This makes Overtone the winner in my book!

Also, thanks to Offbeat Home, where I originally heard about Overtone.

(This review is in no way sponsored by anyone — I just wanted to write about a cool product I’ve been using)

August Pull Up Challenge Day 2 and Back Squat PR

Day 2 of the challenge is Ring Rows at a  “31X2” tempo, 6-8 reps x 4 sets; rest 1-2min between sets.  The tempo is explained this way:

’3′ is the lowering portion; ’1′ is the hold at the bottom; ‘X’ means explode up; ’2′ is the hold at the end of the movement. So from the starting position pull chest thru the rings then pause for 2 sec, lower for 3 sec and pause for 1 sec before you repeat. You will do 6-8 reps at this tempo!

I did 4 sets with 6 reps in each.

Another part of today’s workout was to find our 1 rep max for Back Squats.  My last recorded 1RM was 145#.  I blasted that out of the water today, and lifted 173#.  I’m fairly certain I could have gone higher if I’d wanted, but I decided that ending on a high note (nearly 30# over my previous PR!!!) was good enough.

Major thanks to Ellen and her Mobility classes on this one — my squats have gotten worlds better since she showed me how to properly activate everything when squatting.

August Pull Up Challenge – Initial Test and Day 1

Crossfit Moxie is running a ‘Coaches Challenge’ (initial week described here) this month to help folks improve their pull ups.  Mine need a lot of work, so I’m in!

Initial test:

As an initial test to help keep track of progress, we’re supposed to answer:

Start today by testing your pull-up and posting to comments that you are in.  How many can you do?  Can you do one!?  How are your negatives?  How long can you hold the flex arm hang?  What ever you choose, you will do the same at the end to see if you’ve made progress. WRITE IT DOWN!

This is my writing it down 🙂

I can do 0 unassisted strict pull ups.  I did not test negatives, but I imagine they’re not strong.  I can’t really hold a flex arm hang — When I jumped up for flex arm hangs today, I pretty much immediately came back down.

As for assisted pull ups, I currently use two green bands.  I can do ~10 kipping banded pull ups, and ~2-3 unbroken strict banded pull ups.

Day 1: 

Day 1 of the challenge is ‘Accumulate 2 min in a static hang or flex arm hang’.  I did a combination — 1 min static hang, 1 min flex arm hang.  I was able to accumulate the static hang in 8-15 second chunks.  My flex arm hang is not at all strong, so I actually did 60 jumps up into the flex arm position as each jump took about 1 second.

Garden, Spring 2014 Edition

Thanks to some lessons I learned with last year’s garden, I made some different choices this year.

Last year, I planted tomatoes and various peppers in the back right bed, two varieties of strawberries in the front right bed, I left blueberry bushes in the back left bed, and I planted an existing set of jalepeno plants in the front left bed.  I later added a volunteer watermelon vine and a volunteer cherry tomato plant I found in the other beds.

This setup revealed a few things — The front left bed grows plants very well, but the back right bed does not.  One variety of strawberries was also low yield because the berries grow close to the ground where the berries are hard to find and susceptible to pests.  That variety also produced small berries that weren’t very flavorful.  The other variety of strawberries,  however, grows berries up above the plant leaves and produces larger, more flavorful berries.  Also, the blueberry bushes never got much traction in coming back to life after I under watered them when I first planted them.

So this year, I’ve done things a bit differently.  I’m leaving the back right bed basically fallow in the hopes that the compost worms I put in the ground ages ago improve the soil.

IMAG1148

I ripped out most of the variety of strawberries I didn’t like, and planted more of the variety I did like.

IMAG1144

In the front left bed, I planted three tomato plants and two new jalepeno plants.  I also left in my existing jalepeno plant.  It produces jalepenos that aren’t spicy at all, but they add a nice vegetable touch to things like breakfast eggs.

In the back left bed, I pulled out the blueberries and planted mixed lettuce and cucumbers.  I’m hoping this bed is perfect for these, as it gets the least sun.  Cucumbers and lettuce prefer cooler spots to grow, so hopefully the partial shade will help them thrive.

As a final touch, because I hate to give up on any plant that might still be alive, I planted the blueberry bush that’s still hanging in there in a pot.  I also over bought on strawberries, so some of those went in pots as well.

IMAG1152

That covers all the planting I’m likely to do this year.  Next up — I need to adjust my irrigation for the new plant locations.

Sweet Potato Pecan Crumbles

I got this recipe from the Le Creuset “Mini-Cocotte” cookbook, and plan to adapt it to larger sizes for Thanksgiving.  I’m putting it up here to make it easy to find.

Sweet Potato Pecan Crumbles

Ingredients:

  • 2.25 lbs sweet potatoes
  • 1/4 C flour
  • 1/4 C dark brown sugar
  • 1/2 t pumpkin pie spice
  • 1/2 stick sweet butter, well chilled and cut into small cubes
  • 2 oz pecans
  • 1/4 cup maple syrup

Instructions:

Preheat the oven to 350.

Lightly butter 4 mini cocottes.

In a medium sized mixing bowl, add the sugar and spices to the flour.  With your finger tips, swiftly work the cold butter into the dry ingredients.  It should look like cornmeal.  Careful! Proceed quickly.  If your ingredients become too warm, put the bowl immediately into the refrigerator for 15 minutes until all is very well chilled and begin again.

Peel the sweet potatoes and cut them diagonally into 1/4 inch slices.  Divide these between the 4 mini cocottes.  Sprinkle each with half of the “crumble” mixture.  Layer the rest of the sweet potatoes slices with the remaining “crumble”.  Scatter the pecans and moisten each with the maple syrup.

Cover with a sheet of aluminium and bake alongside your roast for 45 minutes.  Remove the foil after 30 minutes.  Serve piping hot!

This recipe definitely has some promise, but I’m not certain the authors had anyone proofread or attempt to make this after they wrote the recipe.  For example, they tell you to divide all the sweet potatoes into the cocottes, but then they tell you to put in the rest of the sweet potatoes.

I think of most recipes as guidelines anyway, so I’ll be able to work off this to make something very delicious.

Pico de Gallo

I just harvested a bunch of tomatoes from the garden but we’re about to go out of town for a week, so I made a big bowl of pico de gallo in the hopes of eating the tomatoes before we leave.

Here’s what I used:

  • 10-ish tomatoes, chopped
  • 2-ish cups white onion, chopped
  • 3 jalepenos, diced
  • 1 serrano, diced
  • 1 lime, squeezed
  • 4-ish drizzles olive oil
  • salt, to taste

I chopped the tomatoes first, and tailored the other quantities of ingredients to that.  I then added everything else to taste.   It’s not very spicy, except when I get a piece of jalepeno or serrano.  I didn’t add more pepper, though, as it will get spicier as it sits.


IMAG0832

Bedside Tables

We really like wood furniture.  We generally prefer dark wood finishes, but many of the second hand pieces we’ve found have had light finishes.  Thankfully, some patience, a sander, and some stain can solve this.

Recently, over the course of about a month, I refinished our bedside tables.  Previously, I refinished the coffee table and the living room end table.

The bedside tables started out a with a finish I’d describe as ‘honey colored’.

I quickly realized that my belt sander was not well suited to these tables.  So, I acquired a Black and Decker Mouse sander.  This little guy was much better suited to the job.  Also, you can clearly see the difference between the already sanded areas and the yet to be sanded parts.

It took a long time to strip off all the old finish.  Once the old finish was off, though, subsequent sandings went quite quickly.

Once the sanding was done, I started in on the stain.  I used the same stain I used on the coffee table and end table.  I think the color is ‘Espresso’.  I’ve gotten decent coverage — four pieces of furniture out of only one quart, and there’s still some left.

The color is especially striking above, when you compare the table with a coat of stain to the table that is still raw.

It took three or four coats of stain before I was satisfied with the color.

After I was happy with the stain, I applied the top coat.  I used a spray on, ‘satin’ finish.

And there you have it!